There are a few ways to measure within Acres:
- With our Quick Measure Tool (point-to-point distance in feet/miles or meters)
- With our Line Drawing Tool (length of a line in feet)
- With our Shape Drawing Tool (area of a shape in acres)
Measuring point-to-point distance with the Quick Measure Tool:

- The “ruler” quickly calculates distance between points in feet/miles or meters.
- Select the Measure Tool (the ruler icon on the tool bar).
- Click anywhere on the map to start.

- Click again to drop an ending point to get your measurement.
- Each click is a point, and each point includes a measurement from the last point to the current point, not the cumulative distance.
- As you move your mouse, you’ll see the measurement — this is the cumulative distance, regardless of how many points you’ve dropped.
- To switch from feet to meters, click the toggle icon.
- To clear your selections, select Clear.
- This tool is meant for quick measuring, not to create set lines.
Measuring length with the Line Drawing Tool:
- Lines calculate cumulative length in feet.
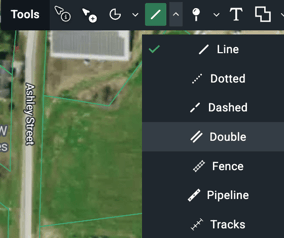
- Select the desired line/road style from the tool bar.
- Click on the map to start drawing your desired shape.
- Double click or hit “Enter” on the keyboard when the line is completed.
- A new line will be created and is accessible in the Selections Panel.

- Select the line and a panel will open up that shows the length.

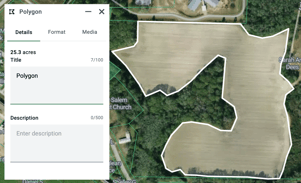
Measuring area with the Shape drawing tool:
- Shapes calculate area in acres.
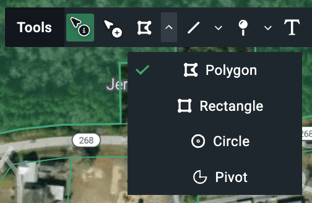
- Select the desired shape (polygon, rectangle, circle or pivot) from the tool bar.
- Click on the map to start drawing a shape.
- Polygon: click to set points to follow the contours of the land. Double click or hit “Enter” on the keyboard when the shape is completed.
- Rectangle and Circle: click and drag, and release to create your shape.
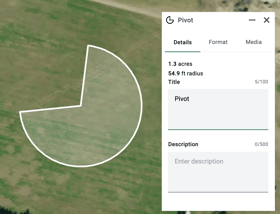
- Pivot: Click to set the center point, then click to set the exterior boundary. The pivot will expand clockwise from the exterior point. Click create the end point.
- After each shape is drawn, the option of Boundary or Drawing is given.
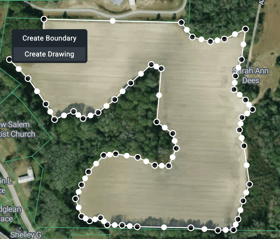
- Select the Drawing option.
- A new shape will be created and is accessible in the Selections Panel under the “Drawing” header. Learn more about drawings here.
- Select a shape and a panel will open up that shows the area of the shape.
- The pivot tool will also show the radius in feet.